先日、M5Stackにセンサをつないで、データ測定の動作確認をしました。
Grove温湿度・気圧センサで測定したデータを、液晶画面に表示することができました。
あとは、測定したデータを、Wi-Fiでクラウドに送信することができれば、IoTデバイスのできあがりです。
そんな訳で、今回は、M5StackでWi-Fi通信を試してみようと思います。
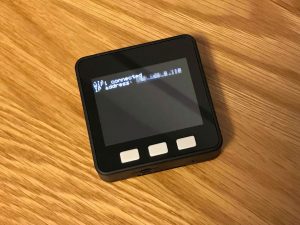
まず最初に、以下のような簡単なスケッチを書いてみました。M5StackからWi-Fiルータに接続するだけのものです。
#include <M5Stack.h>
#include <WiFi.h>

const char* ssid     = "xxxxxxxx";
const char* password = "xxxxxxxx";

void setup() {
  M5.begin();
  M5.Lcd.setTextSize(2);

  WiFi.begin(ssid, password);
  while (WiFi.status() != WL_CONNECTED) {
    delay(500);
    M5.Lcd.print(".");
  }
  M5.Lcd.print("\r\nWiFi connected\r\nIP address: ");
  M5.Lcd.println(WiFi.localIP());
}

void loop() {
}
Wi-Fiルータに接続できたら、IPアドレスが表示されます。
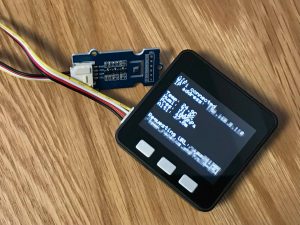
次に、Grove温湿度・気圧センサで測定した温度データを、クラウドに送信してみます。
「上記のスケッチ」、「M5StackにGrove温湿度・気圧センサをつないだ時のスケッチ」、「ESPr Developerで温度データをWebサーバに送った時のスケッチ」の3点を組み合わせて、以下のようなスケッチを作成しました。
#include <M5Stack.h>
#include "Seeed_BME280.h"
#include <Wire.h>
#include <WiFi.h>

const char* ssid     = "xxxxxxxx";
const char* password = "xxxxxxxx";
char host[40]        = "xxxxxxxx";
char event[40]       = "/temp_receive.php";

BME280 bme280;

void setup() {
  M5.begin();
  M5.Lcd.setTextSize(2);

  if(!bme280.init()){
    while(true);
  }

  WiFi.begin(ssid, password);
  while (WiFi.status() != WL_CONNECTED) {
    delay(500);
    M5.Lcd.print(".");
  }
  M5.Lcd.print("\r\nWiFi connected\r\nIP address: ");
  M5.Lcd.println(WiFi.localIP());
}

void loop() {
  float    temp = bme280.getTemperature();
  float    humi = bme280.getHumidity();
  uint32_t pres = bme280.getPressure();
  float    alti = bme280.calcAltitude(pres);

  M5.Lcd.setCursor(0, 80);
  M5.Lcd.printf("Temp:%5.1fC\n", temp);
  M5.Lcd.printf("Humi:%5.1f%%\n", humi);
  M5.Lcd.printf("Pres:%5dhPa\n", pres/100 );
  M5.Lcd.printf("Alti:%5.1fm\n", alti);

  M5.Lcd.setCursor(0, 180);

  WiFiClient client;
  const int httpPort = 80;
  if (!client.connect(host, httpPort)) {
    M5.Lcd.println("connection failed");
    return;
  }

  String url = String(event) + "?val0=" + String(int(temp*1024/100));
  M5.Lcd.print("Requesting URL:");
  M5.Lcd.println(url);

  client.print(String("GET ") + url + " HTTP/1.1\r\n" + "Host: " + host + "\r\n" + "Connection: close\r\n\r\n");
  unsigned long timeout = millis();
  while (client.available() == 0) {
    if (millis() - timeout > 5000) {
      M5.Lcd.println(">>> Client Timeout !");
      client.stop();
      return;
    }
  }
  while(client.available()){
    String line = client.readStringUntil('\r');
  }
  delay(30000);
}
このデータを受け取ることになる、クラウド側のPHPプログラムは、元々は別の温度センサの測定値を受信していたため、受信データを補正(100/1024倍)したものを温度として扱っています。
そのPHPプログラムをそのまま流用したいため、本スケッチでは、測定した温度を逆補正(1024/100倍)してから送信しています。
スケッチをM5Stackに書き込むと、30秒ごとに温度データがクラウドに送信されます。
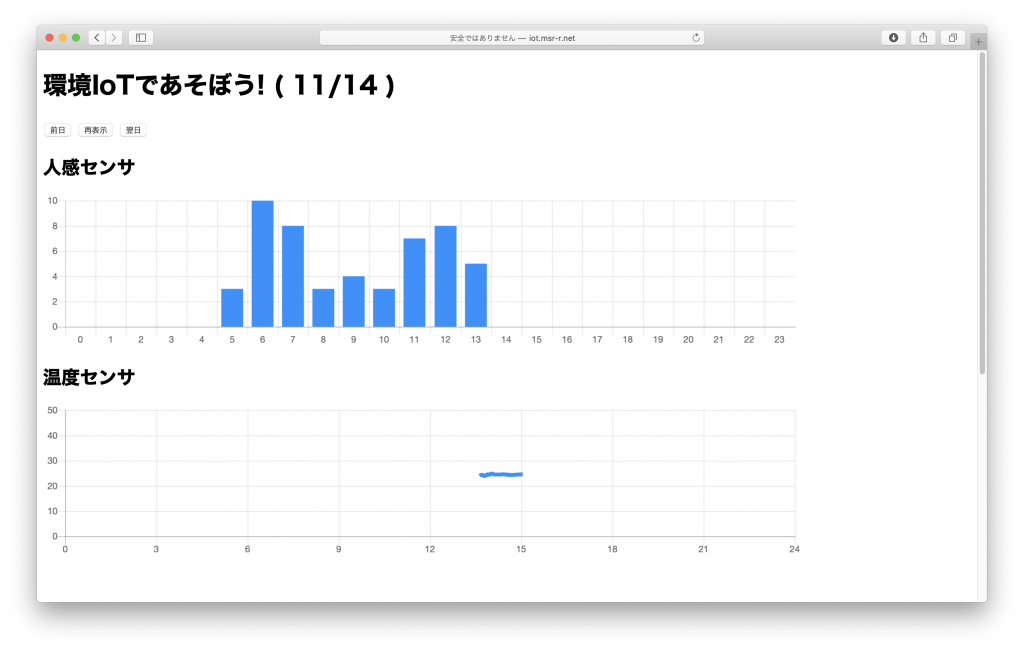
(なお、上段の「人感センサ」のグラフは、別のセンサで測定したデータであり、本記事には関係ありません。)
なお、私がM5Stack、M5StickCの使い方を習得するのにあたっては、以下の書籍を参考にさせていただきました。
ごく基本的なところから、かなり複雑なスケッチや、ネットワーク接続など、比較的高度なものまで、つまづかずに読み進めていけるような構成になっており、大変わかりやすい本です。
このサイトで書いている、M5Stackシリーズ(M5Stack、M5StickCなど)に関するブログ記事を、「さとやまノート」という別のブログページに、あらためて整理してまとめました。
他のM5Stackシリーズの記事にも興味のある方は「さとやまノート」をご覧ください。